Author: Jason Brownlee
Image data augmentation is a technique that can be used to artificially expand the size of a training dataset by creating modified versions of images in the dataset.
Training deep learning neural network models on more data can result in more skillful models, and the augmentation techniques can create variations of the images that can improve the ability of the fit models to generalize what they have learned to new images.
The Keras deep learning neural network library provides the capability to fit models using image data augmentation via the ImageDataGenerator class.
In this tutorial, you will discover how to use image data augmentation when training deep learning neural networks.
After completing this tutorial, you will know:
- Image data augmentation is used to expand the training dataset in order to improve the performance and ability of the model to generalize.
- Image data augmentation is supported in the Keras deep learning library via the ImageDataGenerator class.
- How to use shift, flip, brightness, and zoom image data augmentation.
Let’s get started.
Tutorial Overview
This tutorial is divided into eight parts; they are:
- Image Data Augmentation
- Sample Image
- Image Augmentation With ImageDataGenerator
- Horizontal and Vertical Shift Augmentation
- Horizontal and Vertical Flip Augmentation
- Random Rotation Augmentation
- Random Brightness Augmentation
- Random Zoom Augmentation
Image Data Augmentation
The performance of deep learning neural networks often improves with the amount of data available.
Data augmentation is a technique to artificially create new training data from existing training data. This is done by applying domain-specific techniques to examples from the training data that create new and different training examples.
Image data augmentation is perhaps the most well-known type of data augmentation and involves creating transformed versions of images in the training dataset that belong to the same class as the original image.
Transforms include a range of operations from the field of image manipulation, such as shifts, flips, zooms, and much more.
The intent is to expand the training dataset with new, plausible examples. This means, variations of the training set images that are likely to be seen by the model. For example, a horizontal flip of a picture of a cat may make sense, because the photo could have been taken from the left or right. A vertical flip of the photo of a cat does not make sense and would probably not be appropriate given that the model is very unlikely to see a photo of an upside down cat.
As such, it is clear that the choice of the specific data augmentation techniques used for a training dataset must be chosen carefully and within the context of the training dataset and knowledge of the problem domain. In addition, it can be useful to experiment with data augmentation methods in isolation and in concert to see if they result in a measurable improvement to model performance, perhaps with a small prototype dataset, model, and training run.
Modern deep learning algorithms, such as the convolutional neural network, or CNN, can learn features that are invariant to their location in the image. Nevertheless, augmentation can further aid in this transform invariant approach to learning and can aid the model in learning features that are also invariant to transforms such as left-to-right to top-to-bottom ordering, light levels in photographs, and more.
Image data augmentation is typically only applied to the training dataset, and not to the validation or test dataset. This is different from data preparation such as image resizing and pixel scaling; they must be performed consistently across all datasets that interact with the model.
Want Results with Deep Learning for Computer Vision?
Take my free 7-day email crash course now (with sample code).
Click to sign-up and also get a free PDF Ebook version of the course.
Sample Image
We need a sample image to demonstrate standard data augmentation techniques.
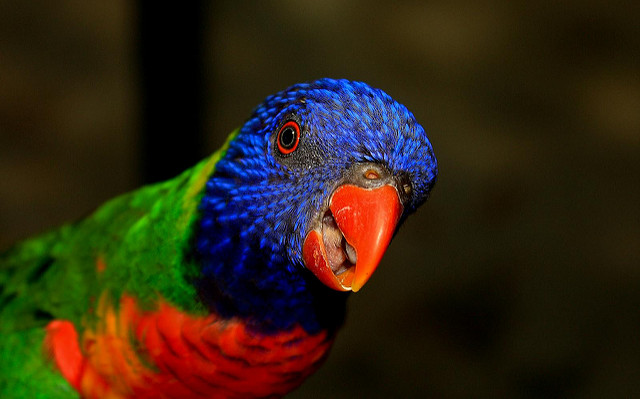
In this tutorial, we will use a photograph of a bird titled “Feathered Friend” by AndYaDontStop, released under a permissive license.
Download the image and save it in your current working directory with the filename ‘bird.jpg‘.

Feathered Friend, taken by AndYaDontStop.
Some rights reserved.
Image Augmentation With ImageDataGenerator
The Keras deep learning library provides the ability to use data augmentation automatically when training a model.
This is achieved by using the ImageDataGenerator class.
First, the class may be instantiated and the configuration for the types of data augmentation are specified by arguments to the class constructor.
A range of techniques are supported, as well as pixel scaling methods. We will focus on five main types of data augmentation techniques for image data; specifically:
- Image shifts via the width_shift_range and height_shift_range arguments.
- Image flips via the horizontal_flip and vertical_flip arguments.
- Image rotations via the rotation_range argument
- Image brightness via the brightness_range argument.
- Image zoom via the zoom_range argument.
For example, an instance of the ImageDataGenerator class can be constructed.
...
# create data generator
datagen = ImageDataGenerator()
Once constructed, an iterator can be created for an image dataset.
The iterator will return one batch of augmented images for each iteration.
An iterator can be created from an image dataset loaded in memory via the flow() function; for example:
...
# load image dataset
X, y = ...
# create iterator
it = dataset.flow(X, y)
Alternately, an iterator can be created for an image dataset located on disk in a specified directory, where images in that directory are organized into subdirectories according to their class.
...
# create iterator
it = dataset.flow_from_directory(X, y, ...)
Once the iterator is created, it can be used to train a neural network model by calling the fit_generator() function.
The steps_per_epoch argument must specify the number of batches of samples comprising one epoch. For example, if your original dataset has 10,000 images and your batch size is 32, then a reasonable value for steps_per_epoch when fitting a model on the augmented data might be ceil(10,000/32), or 313 batches.
# define model
model = ...
# fit model on the augmented dataset
model.fit_generator(it, steps_per_epoch=313, ...)
The images in the dataset are not used directly. Instead, only augmented images are provided to the model. Because the augmentations are performed randomly, this allows both modified images and close facsimiles of the original images (e.g. almost no augmentation) to be generated and used during training.
A data generator can also be used to specify the validation dataset and the test dataset. Often, a separate ImageDataGenerator instance is used that may have the same pixel scaling configuration (not covered in this tutorial) as the ImageDataGenerator instance used for the training dataset, but would not use data augmentation. This is because data augmentation is only used as a technique for artificially extending the training dataset in order to improve model performance on an unaugmented dataset.
Now that we are familiar with how to use the ImageDataGenerator, let’s look at some specific data augmentation techniques for image data.
We will demonstrate each technique standalone by reviewing examples of images after they have been augmented. This is a good practice and is recommended when configuring your data augmentation. It is also common to use a range of augmentation techniques at the same time when training. We have isolated the techniques to one per section for demonstration purposes only.
Horizontal and Vertical Shift Augmentation
A shift to an image means moving all pixels of the image in one direction, such as horizontally or vertically, while keeping the image dimensions the same.
This means that some of the pixels will be clipped off the image and there will be a region of the image where new pixel values will have to be specified.
The width_shift_range and height_shift_range arguments to the ImageDataGenerator constructor control the amount of horizontal and vertical shift respectively.
These arguments can specify a floating point value that indicates the percentage (between 0 and 1) of the width or height of the image to shift. Alternately, a number of pixels can be specified to shift the image.
Specifically, a value in the range between no shift and the percentage or pixel value will be sampled for each image and the shift performed, e.g. [0, value]. Alternately, you can specify a tuple or array of the min and max range from which the shift will be sampled; for example: [-100, 100] or [-0.5, 0.5].
The example below demonstrates a horizontal shift with the width_shift_range argument between [-200,200] pixels and generates a plot of generated images to demonstrate the effect.
# example of horizontal shift image augmentation
from numpy import expand_dims
from keras.preprocessing.image import load_img
from keras.preprocessing.image import img_to_array
from keras.preprocessing.image import ImageDataGenerator
from matplotlib import pyplot
# load the image
img = load_img('bird.jpg')
# convert to numpy array
data = img_to_array(img)
# expand dimension to one sample
samples = expand_dims(data, 0)
# create image data augmentation generator
datagen = ImageDataGenerator(width_shift_range=[-200,200])
# prepare iterator
it = datagen.flow(samples, batch_size=1)
# generate samples and plot
for i in range(9):
	# define subplot
	pyplot.subplot(330 + 1 + i)
	# generate batch of images
	batch = it.next()
	# convert to unsigned integers for viewing
	image = batch[0].astype('uint32')
	# plot raw pixel data
	pyplot.imshow(image)
# show the figure
pyplot.show()
Running the example creates the instance of ImageDataGenerator configured for image augmentation, then creates the iterator. The iterator is then called nine times in a loop and each augmented image is plotted.
We can see in the plot of the result that a range of different randomly selected positive and negative horizontal shifts was performed and the pixel values at the edge of the image are duplicated to fill in the empty part of the image created by the shift.
Plot of Augmented Generated With a Random Horizontal Shift
Below is the same example updated to perform vertical shifts of the image via the height_shift_range argument, in this case specifying the percentage of the image to shift as 0.5 the height of the image.
# example of vertical shift image augmentation
from numpy import expand_dims
from keras.preprocessing.image import load_img
from keras.preprocessing.image import img_to_array
from keras.preprocessing.image import ImageDataGenerator
from matplotlib import pyplot
# load the image
img = load_img('bird.jpg')
# convert to numpy array
data = img_to_array(img)
# expand dimension to one sample
samples = expand_dims(data, 0)
# create image data augmentation generator
datagen = ImageDataGenerator(height_shift_range=0.5)
# prepare iterator
it = datagen.flow(samples, batch_size=1)
# generate samples and plot
for i in range(9):
	# define subplot
	pyplot.subplot(330 + 1 + i)
	# generate batch of images
	batch = it.next()
	# convert to unsigned integers for viewing
	image = batch[0].astype('uint32')
	# plot raw pixel data
	pyplot.imshow(image)
# show the figure
pyplot.show()
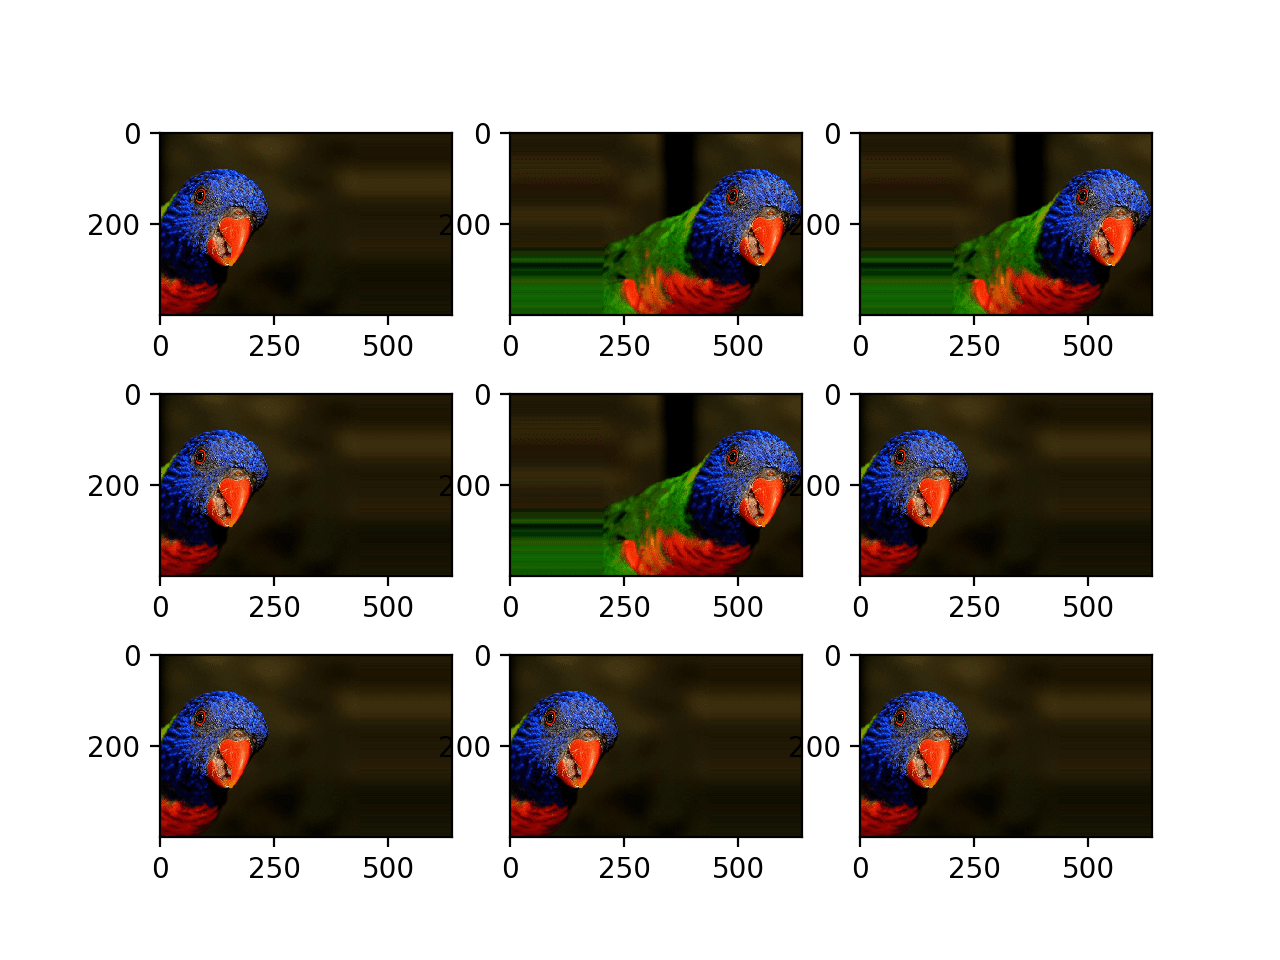
Running the example creates a plot of images augmented with random positive and negative vertical shifts.
We can see that both horizontal and vertical positive and negative shifts probably make sense for the chosen photograph, but in some cases, the replicated pixels at the edge of the image may not make sense to a model.
Note that other fill modes can be specified via “fill_mode” argument.
Plot of Augmented Images With a Random Vertical Shift
Horizontal and Vertical Flip Augmentation
An image flip means reversing the rows or columns of pixels in the case of a vertical or horizontal flip respectively.
The flip augmentation is specified by a boolean horizontal_flip or vertical_flip argument to the ImageDataGenerator class constructor. For photographs like the bird photograph used in this tutorial, horizontal flips may make sense, but vertical flips would not.
For other types of images, such as aerial photographs, cosmology photographs, and microscopic photographs, perhaps vertical flips make sense.
The example below demonstrates augmenting the chosen photograph with horizontal flips via the horizontal_flip argument.
# example of horizontal flip image augmentation
from numpy import expand_dims
from keras.preprocessing.image import load_img
from keras.preprocessing.image import img_to_array
from keras.preprocessing.image import ImageDataGenerator
from matplotlib import pyplot
# load the image
img = load_img('bird.jpg')
# convert to numpy array
data = img_to_array(img)
# expand dimension to one sample
samples = expand_dims(data, 0)
# create image data augmentation generator
datagen = ImageDataGenerator(horizontal_flip=True)
# prepare iterator
it = datagen.flow(samples, batch_size=1)
# generate samples and plot
for i in range(9):
	# define subplot
	pyplot.subplot(330 + 1 + i)
	# generate batch of images
	batch = it.next()
	# convert to unsigned integers for viewing
	image = batch[0].astype('uint32')
	# plot raw pixel data
	pyplot.imshow(image)
# show the figure
pyplot.show()
Running the example creates a plot of nine augmented images.
We can see that the horizontal flip is applied randomly to some images and not others.
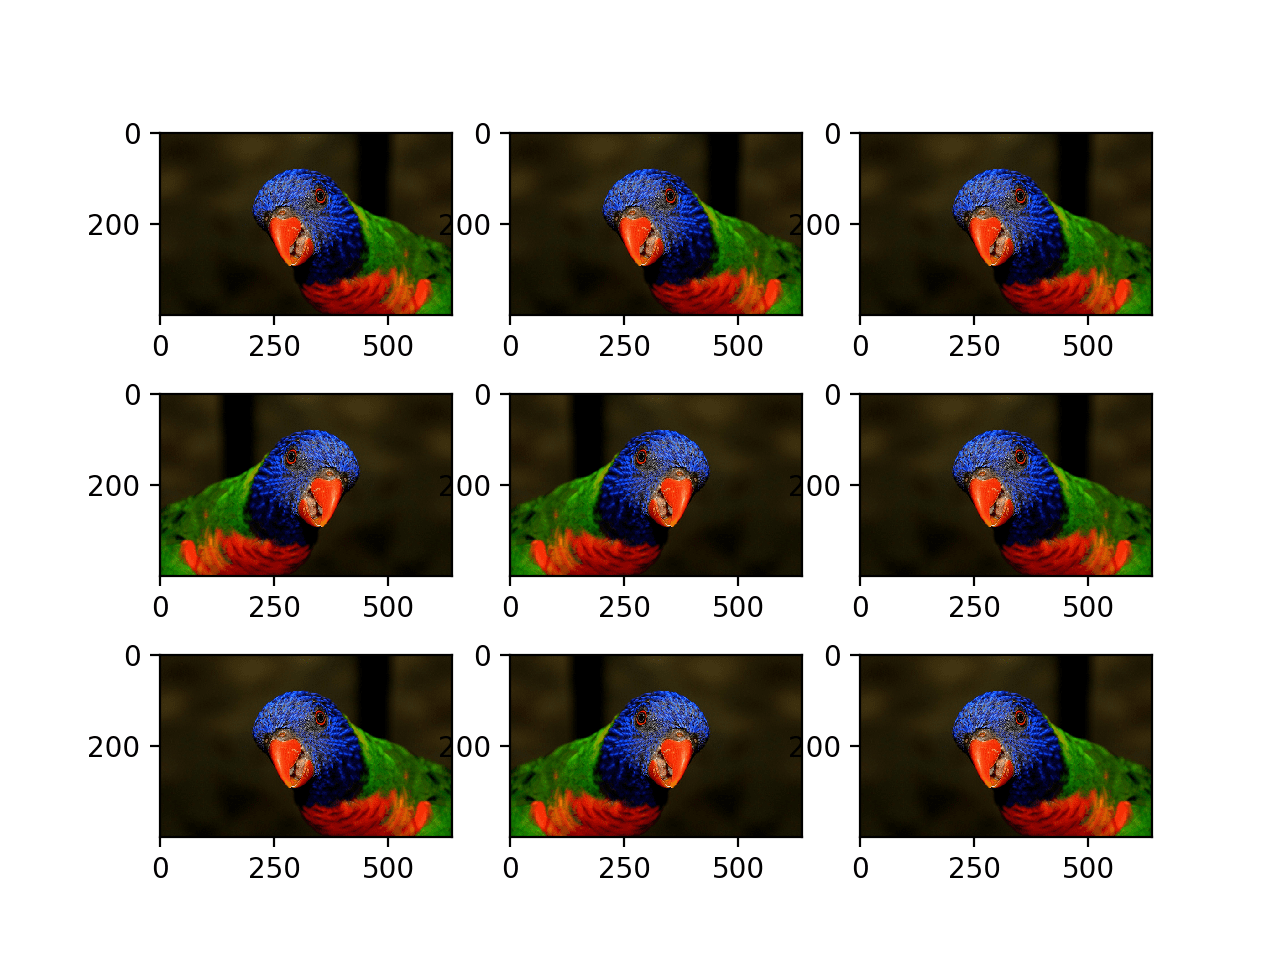
Plot of Augmented Images With a Random Horizontal Flip
Random Rotation Augmentation
A rotation augmentation randomly rotates the image clockwise by a given number of degrees from 0 to 360.
The rotation will likely rotate pixels out of the image frame and leave areas of the frame with no pixel data that must be filled in.
The example below demonstrates random rotations via the rotation_range argument, with rotations to the image between 0 and 90 degrees.
# example of random rotation image augmentation
from numpy import expand_dims
from keras.preprocessing.image import load_img
from keras.preprocessing.image import img_to_array
from keras.preprocessing.image import ImageDataGenerator
from matplotlib import pyplot
# load the image
img = load_img('bird.jpg')
# convert to numpy array
data = img_to_array(img)
# expand dimension to one sample
samples = expand_dims(data, 0)
# create image data augmentation generator
datagen = ImageDataGenerator(rotation_range=90)
# prepare iterator
it = datagen.flow(samples, batch_size=1)
# generate samples and plot
for i in range(9):
	# define subplot
	pyplot.subplot(330 + 1 + i)
	# generate batch of images
	batch = it.next()
	# convert to unsigned integers for viewing
	image = batch[0].astype('uint32')
	# plot raw pixel data
	pyplot.imshow(image)
# show the figure
pyplot.show()
Running the example generates examples of the rotated image, showing in some cases pixels rotated out of the frame and the nearest-neighbor fill.
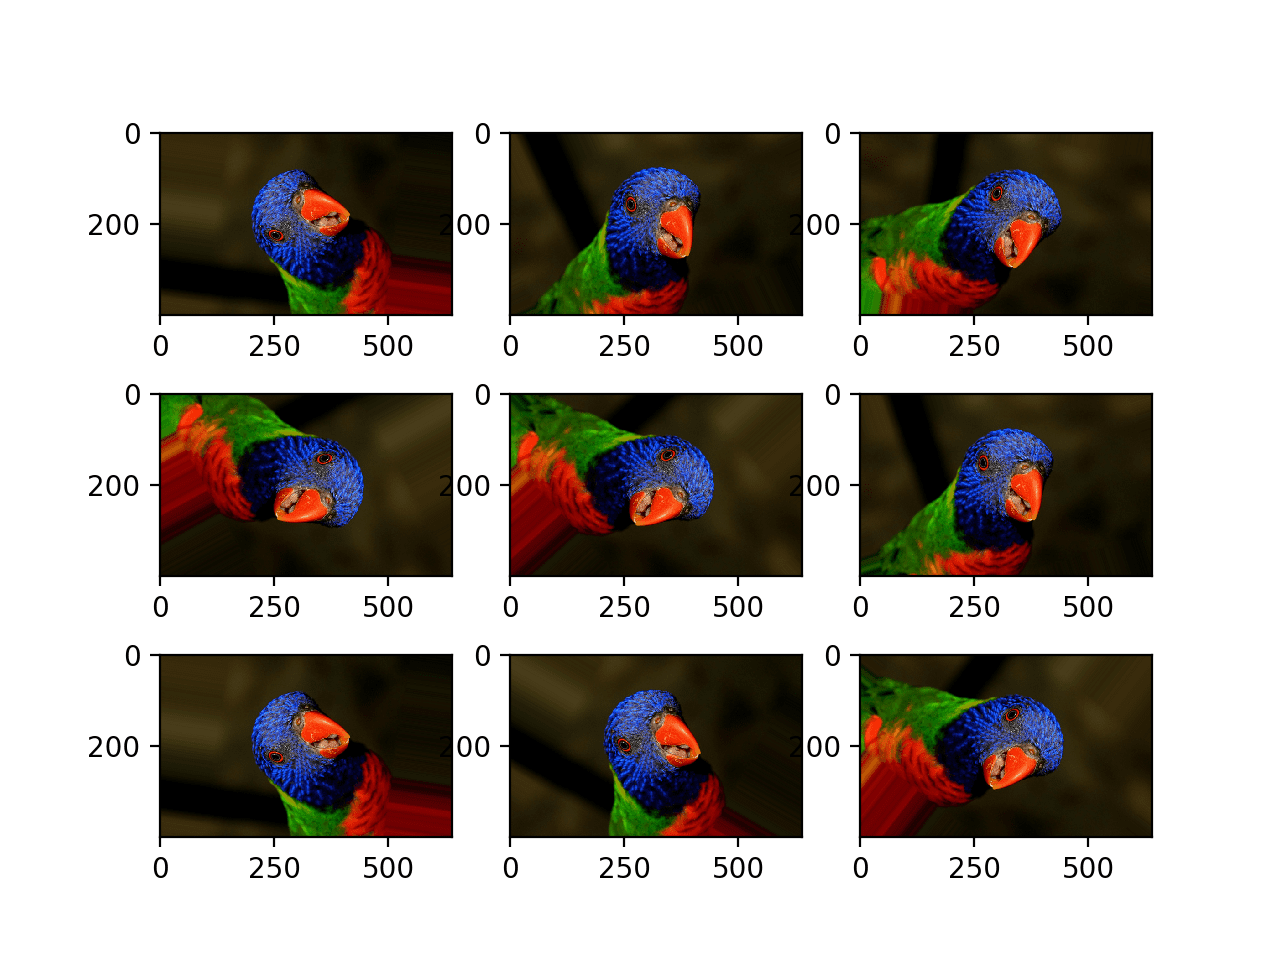
Plot of Images Generated With a Random Rotation Augmentation
Random Brightness Augmentation
The brightness of the image can be augmented by either randomly darkening images, brightening images, or both.
The intent is to allow a model to generalize across images trained on different lighting levels.
This can be achieved by specifying the brightness_range argument to the ImageDataGenerator() constructor that specifies min and max range as a float representing a percentage for selecting a brightening amount.
Values less than 1.0 darken the image, e.g. [0.5, 1.0], whereas values larger than 1.0 brighten the image, e.g. [1.0, 1.5], where 1.0 has no effect on brightness.
The example below demonstrates a brightness image augmentation, allowing the generator to randomly darken the image between 1.0 (no change) and 0.2 or 20%.
# example of brighting image augmentation
from numpy import expand_dims
from keras.preprocessing.image import load_img
from keras.preprocessing.image import img_to_array
from keras.preprocessing.image import ImageDataGenerator
from matplotlib import pyplot
# load the image
img = load_img('bird.jpg')
# convert to numpy array
data = img_to_array(img)
# expand dimension to one sample
samples = expand_dims(data, 0)
# create image data augmentation generator
datagen = ImageDataGenerator(brightness_range=[0.2,1.0])
# prepare iterator
it = datagen.flow(samples, batch_size=1)
# generate samples and plot
for i in range(9):
	# define subplot
	pyplot.subplot(330 + 1 + i)
	# generate batch of images
	batch = it.next()
	# convert to unsigned integers for viewing
	image = batch[0].astype('uint32')
	# plot raw pixel data
	pyplot.imshow(image)
# show the figure
pyplot.show()
Running the example shows the augmented images with varying amounts of darkening applied.
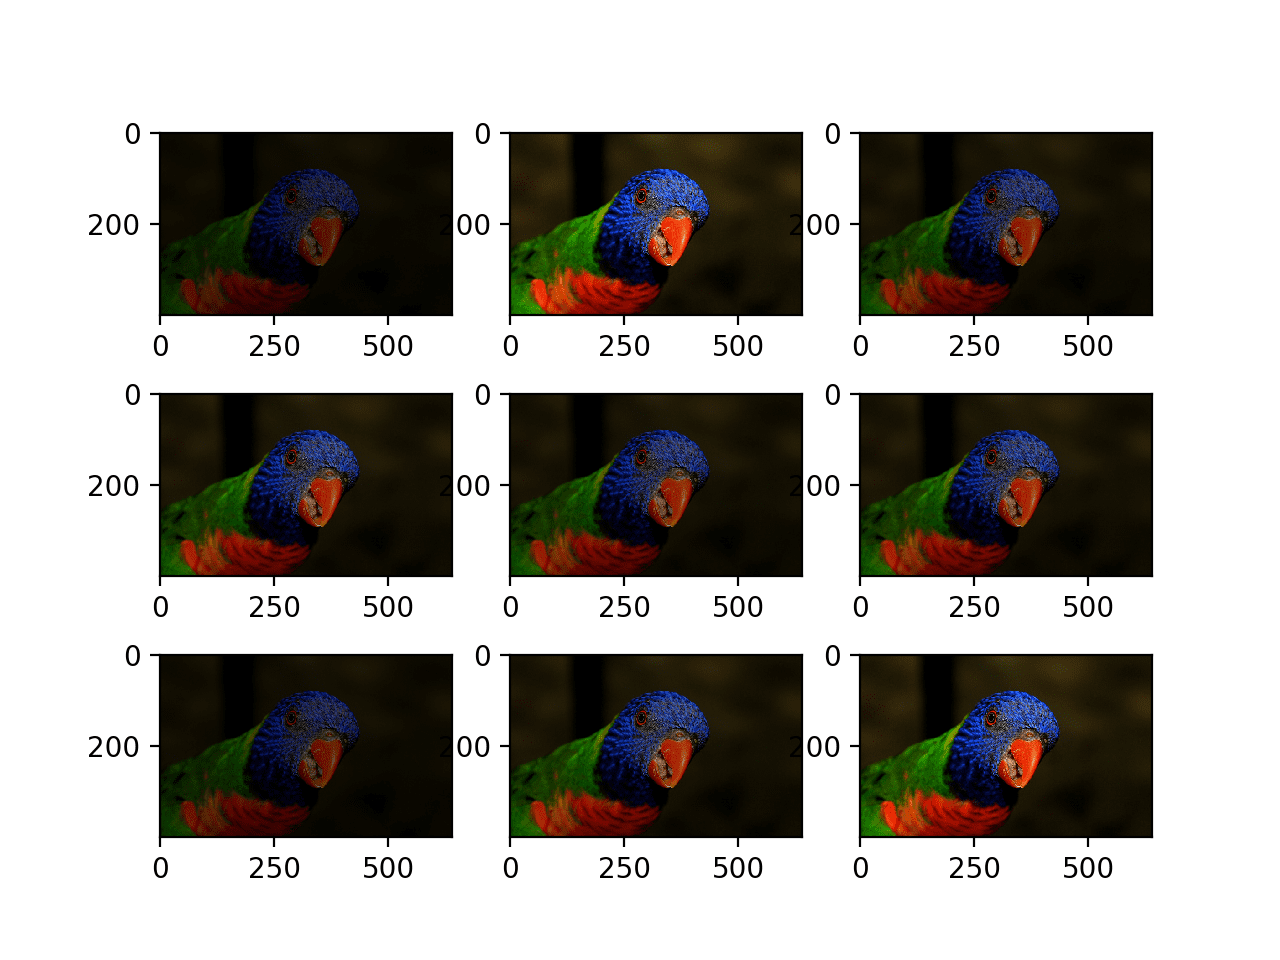
Plot of Images Generated With a Random Brightness Augmentation
Random Zoom Augmentation
A zoom augmentation randomly zooms the image in and either adds new pixel values around the image or interpolates pixel values respectively.
Image zooming can be configured by the zoom_range argument to the ImageDataGenerator constructor. You can specify the percentage of the zoom as a single float or a range as an array or tuple.
If a float is specified, then the range for the zoom will be [1-value, 1+value]. For example, if you specify 0.3, then the range will be [0.7, 1.3], or between 70% (zoom in) and 130% (zoom out).
The zoom amount is uniformly randomly sampled from the zoom region for each dimension (width, height) separately.
The zoom may not feel intuitive. Note that zoom values less than 1.0 will zoom the image in, e.g. [0.5,0.5] makes the object in the image 50% larger or closer, and values larger than 1.0 will zoom the image out by 50%, e.g. [1.5, 1.5] makes the object in the image smaller or further away. A zoom of [1.0,1.0] has no effect.
The example below demonstrates zooming the image in, e.g. making the object in the photograph larger.
# example of zoom image augmentation
from numpy import expand_dims
from keras.preprocessing.image import load_img
from keras.preprocessing.image import img_to_array
from keras.preprocessing.image import ImageDataGenerator
from matplotlib import pyplot
# load the image
img = load_img('bird.jpg')
# convert to numpy array
data = img_to_array(img)
# expand dimension to one sample
samples = expand_dims(data, 0)
# create image data augmentation generator
datagen = ImageDataGenerator(zoom_range=[0.5,1.0])
# prepare iterator
it = datagen.flow(samples, batch_size=1)
# generate samples and plot
for i in range(9):
	# define subplot
	pyplot.subplot(330 + 1 + i)
	# generate batch of images
	batch = it.next()
	# convert to unsigned integers for viewing
	image = batch[0].astype('uint32')
	# plot raw pixel data
	pyplot.imshow(image)
# show the figure
pyplot.show()
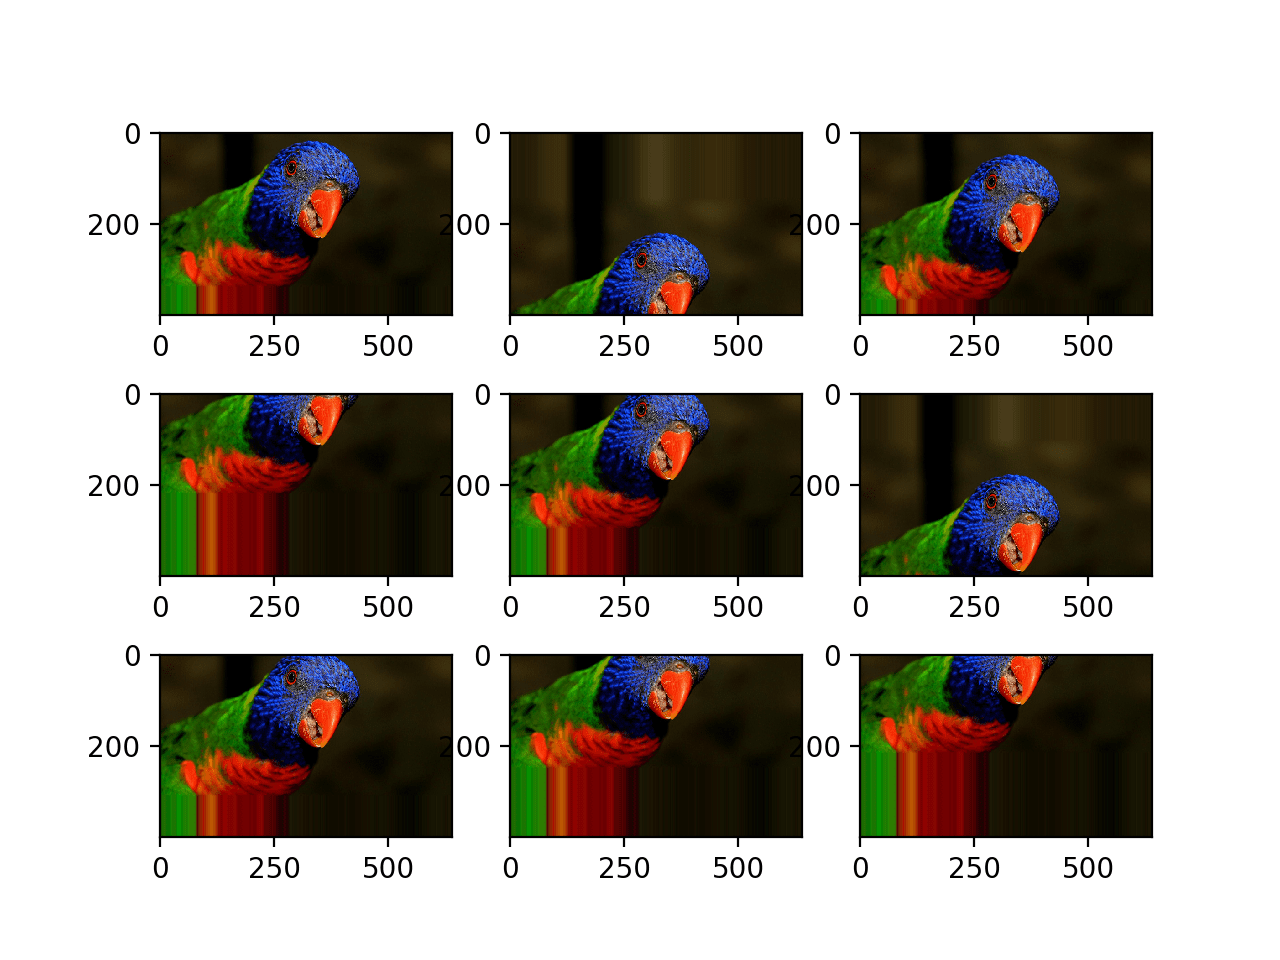
Running the example generates examples of the zoomed image, showing a random zoom in that is different on both the width and height dimensions that also randomly changes the aspect ratio of the object in the image.
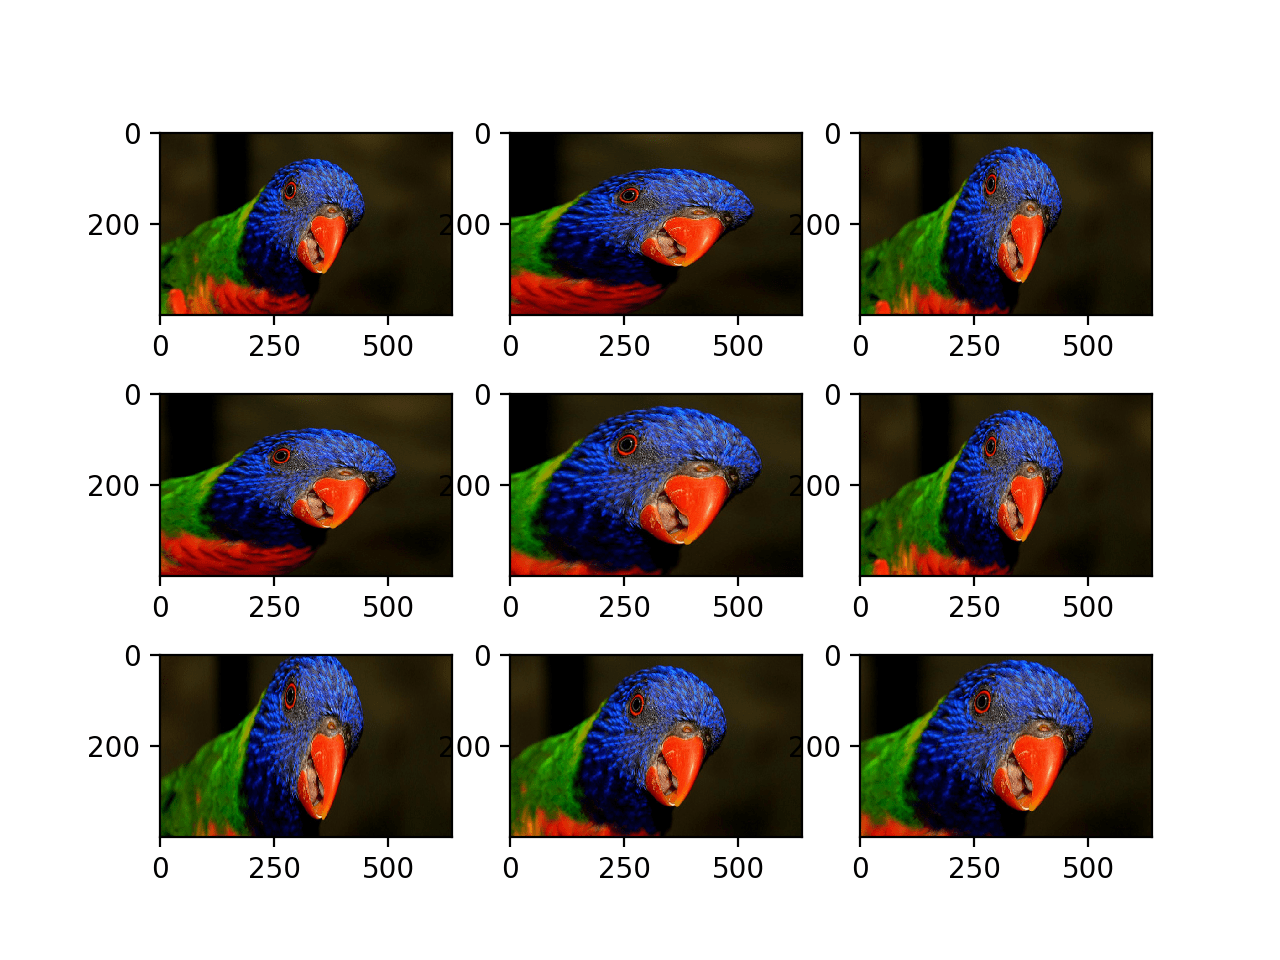
Plot of Images Generated With a Random Zoom Augmentation
Further Reading
This section provides more resources on the topic if you are looking to go deeper.
Posts
API
Articles
Summary
In this tutorial, you discovered how to use image data augmentation when training deep learning neural networks.
Specifically, you learned:
- Image data augmentation is used to expand the training dataset in order to improve the performance and ability of the model to generalize.
- Image data augmentation is supported in the Keras deep learning library via the ImageDataGenerator class.
- How to use shift, flip, brightness, and zoom image data augmentation.
Do you have any questions?
Ask your questions in the comments below and I will do my best to answer.
The post How to Configure Image Data Augmentation When Training Deep Learning Neural Networks appeared first on Machine Learning Mastery.